Wednesday, October 10, 2012

New Food Wednesday - October 10, 2012

Chocolate Covered Insects (in this case - Ants!)
There isn't really a jump-reveal in today's post; the picture above is pretty explicit.  For fans of the "jump," no worries it should return next week.  Apologies.

October 14 is national "Eat Chocolate Covered Insects Day" day!  Okay so it's not a new food per say, but I'm willing to bet most Americans have never (intentionally) eaten an insect, let alone one dipped in chocolate.  I know I never have.  So in a way, today's post is more about an unusual food for self-described members of Western society. 

Man has consumed insects, probably since man was man.  If it exists on planet Earth, I am 99.99% sure someone, somewhere, and at some time has attempted to eat it.  The problem with modern culture (and in this case particularly Western culture) regarding ingestables, rests squarely with the development of social mores.  As time goes on and society begins to flourish, it seems develop a sense of "group think" regarding its diet.  At times this is a direct result of a societal religious belief, but this isn't always the case.  For non-religious examples look no further than the American fast-food/ processed-food craze of the 20th century.  

One could make the case that Western society's aversion to insects developed as a result of Judeo-Christian influence, the teachings of which denounce the consumption of insects (and lobsters incidentally).  If this were the case, Western society should hold pigs (and lobsters) in equal regard with insects.  But we don't; in fact we love pigs soooo much that many experts are predicting a bacon shortage (gasp) next year.  Okay that may be an exaggeration, but we can expect pork prices to rise by as much as 100% during 2013 due to exploding demand.  

While our disdain for insects might be unclear, the nutritional value of these creepy crawlies is not.  High in protein and (mostly) low in fat, insects offer a wide and varied source of nutrition for large populations around the globe.  Heck we even eat regurgitated, partially-digested plant materials mixed with insect saliva; we call just call it honey.

Perhaps it's the fact that insects are so incredibly foreign.  Perhaps it's because they can spread disease and can be toxic to humans.  But so can a lot of things.  The alligator and rattlesnake are also pretty foreign to most Westerners and can be incredibly dangerous, but we are consuming their flesh in record amounts.

The lowly insect gets a bad rap.  So this Sunday, try to be an adventurous foody and buck the "Western diet."  After all, a chocolate covered ant can't be any worse for you than a Big Mac.

Eat good food.  Drink good beer.  And above all, stay classy!


Sunday, October 7, 2012

Random Food Photo - Straight to Ale Tap Room

On a recent Sunday, I found myself with some time to kill, and as luck would have it my friends at the Straight to Ale Tap Room were busy serving beer and showing football.  So I packed up my tiny Toyota, and raced (within the speed limit) to the brewery.

Straight to Ale Montesano Maibock (on top of an Old Towne Brewing Co. coaster)
I really can't say enough about the Huntsville brewery scene; it's exploding!  And our local brewers are producing some pretty high quality brews.  But we shouldn't forget the abandoned dreams that litter the highway to brewing-greatness. 


When STA took over the brewery space formerly held by Huntsville/ Alabama's first brewery since prohibition, the Old Towne Brewing Co., they also inherited a lot of the old paraphernalia. 

On my visit, the STA brew keeper was slinging beer and serving the frothy pint glasses on top of classic coasters from the now defunct brewery. 

While the Old Towne Brewery might not be with us today, its memory lives on... In this case from the bottom of a pint of the STA Montesano Maibock.


Eat good food.  Drink good beer.  And above all, stay classy!


My First Solo Batch of Home Brew - Part 1

To even the most casual observer, my love for beer should be pretty apparent.  I love the way it tastes.  I savor how its carbonation dances across your palate and tickles your tongue.  I admire the craft and artistry used to produce a "good beer."  I even admire the odor that pours from every brewery in America, even though most would probably describe it as funky at best and downright disgusting at worst. 

I really like beer. 


In the past, I've assisted with the production of homemade beer but only as part of a large group.  The experience was fun and the end result was decent, but the beer was watery and could only muster a somewhat mild, underdeveloped flavor. 

The "first brewing experience" (note my 'hipster beard' on the left)
A few weeks ago I was watching a marathon of Alton Brown's mangnum opus, "Good Eats," while walking on the treadmill.  Now being a regular foody and frequent view of both the FoodNetwork and the Cooking Channel, I've seen almost every episode of "Good Eats."  But this particular evening, I was fortunate enough to catch a rerun of Alton's beer episode. 

Alton Brown, the host of "Good Eats"
It was in that moment that I had a culinary epiphany.  In the past, I brewed beer simply because that's what my friends were doing.  I didn't appreciate the sheer artistry of its creation, or the majesty of its perfection.  I was doing what the masses were doing without realizing why...  I had become a douchey hipster.


Fast forward a couple of years.  My growing appreciation for food and its cultural heritage, has also seeped over into my increasing admiration for beer and its history. 

I was ready to make my triumphant return to home brewing.  So after a quick trip to www.northernbrewer.com and dropping a few hundred dollars, I was ready to brew again.  A few days later, I arrived home to the contents of a small UPS truck piled in front of my apartment door.

My own personal UPS truck delivery
End, Part 1.

Eat good food.  Drink good beer.  And above all, stay classy!

Recipes - Mole Chili

So good on a cold fall evening...
Author's Note:

I love mole (the sauce not the earth burrowing rodent).  I know that some people don't enjoy it, and others find it downright disgusting, but I can't get enough of its rich, smoky roasted flavor. 

Mole can be pretty potent.  The first time I ever sampled it in Guanajuato, Mexico, I was so surprised by its punch of flavor that I politely emptied my mouth into a nearby napkin.  But after a second attempt, I was addicted.

Traditionally, this complex Latin American sauce combines more ingredients than a BMW audio system, and then slowly cooks them until a rich earthy smokiness permeates every bite.  Classic ingredients include roasted almonds, chilies, cinnamon, tomatoes, onions, and a dash of chocolate, among other things.
Pollo con mole (photo courtesy of www.gourmetsleuth.com
Now that fall has descended across much of the US and football season is in full swing, it's the perfect time for tailgating.  And every good southerner knows, tailgating isn't complete without a big bowl of chili. 

Everyone has his or her favorite recipe; that perfect bowl of flavorful stew that warms you up on cold game nights.  Some like it without beans, others prefer a white chili made with chicken and green chilis, but I like mine to explode across my palate with big, brash flavor. 

I'll admit this chili recipe isn't for everyone.  But if you're looking for something different and more flavorful than that bland stuff they serve in Cincinnati, this may be the recipe you've been looking for!

RECIPE - MOLE CHILI
By Samuel Parks (October 2012)

Mole Chili, as prepared at the Nook Tavern, in Huntsville, Ala. 

INGREDIENTS:

-2 dried ancho peppers (de-seeded)
-2 Tbs. dried oregano
-2 Tbs. smoked paprika
-1 Tbs. cumin seeds
-1 Tbs. chili powder
-1/2 lb. sliced almonds
-1 lb. bacon (diced and cooked)
-1 lb. stew beef (browned and drained)
-2 large white onions
-1-2 chipotle chili in adobo sauce (finely diced, with more adobo sauce for heat if desired)
-2 (large) cans whole tomatoes
-1 whole cinnamon stick (not ground cinnamon)
-12 oz. bottle dark, malty beer
-1 oz. dark chocolate pieces
-1 oz. semi sweet chocolate pieces
-2 Tbs. red wine vinegar
-2 oz. honey
-1/4 cup flour
-28 oz. red kidney beans (rinsed and drained)
-15 oz. black beans (rinsed and drained)
-1 lb. ground buffalo (browned and drained)
-salt and pepper to taste

DIRECTIONS:

Preheat the oven to 375 degrees.


Place the ancho peppers, oregano, paprika, cumin, chili powder, and almonds on a cookie sheet.  Bake in the preheated oven, for approximately 3-5 minutes or until fragrant.  Allow the spices to cool to room temperature.

Using a food processor, grind the toasted spices and nuts into a fine powder (because of the leathery texture of the dried ancho peppers you may have to shake the bowl of the processor a few times).

Heat a large, non-stick pan over high heat.  When thoroughly heated, place the chopped bacon in the pan.  Cook until crispy.  When fully cooked and crispy, remove from the pan and place on a paper towel to collect any excess oil.  Remove all but 1-2 Tbs. of bacon fat from the pan. 

Using a paper towel, pat-dry the chunks of stew beef.  Reheat the large non-stick pan over high heat.  When heated, transfer the dried beef to the hot pan.  Depending on the size of your pan, it may be necessary to cook the beef in several batches.  There should be some space between the pieces of beef for it to brown (if the pan is overcrowded, the beef will steam-cook instead of searing; browning the meat will ensure it remains juicy and flavorful throughout the long cooking time).  While browning, liberally sprinkle the beef with kosher salt (adding the salt during this step helps to pull additional moisture from the meat).  When the beef is done cooking, allow it to drain in a colander suspended over a bowl.

While the beef is draining, cook the onion over medium heat until tender.

Transfer the cooked bacon, stew beef, onions, spices, chipotle in adobo, tomatoes, cinnamon, and beer to a large slow cooker.  Cook on low for 6-8 hours until the beef is fork tender.

When the beef is tender, discard the cinnamon stick, remove the tomatoes and puree the now well cooked, squishy fruits in a food processor (be very careful; the tomatoes should still be hot and the whirling food processor blades are notorious for flinging steamy red goo in wide arcs across a kitchen).

Return the tomatoes to the cooker, leaving approximately 2 cups in a small bowl.  Add the chocolate to the hot tomato puree.  Stir the chocolate and tomato puree until the chocolate pieces have completely melted.  When melted, return the entire mixture to the slow cooker.

In a small bowl, whisk together the vinegar, honey, and flour until it creates a lump free paste.  Add the paste to the slow cooker.

Add the beans and buffalo to the slow cooker. Allow to cook for approximately 30 more minutes until it reaches the desired thickness.  Adjust taste with additional salt and pepper. 

Serve with sour cream, extra cheese, green onions, and avocados.

Eat good food.  Drink good beer.  And above all, stay classy!


Friday, October 5, 2012

Half a Skillet Short of a Full Pan - 3 Skillets

3Skillets on Urbanspoon

So, it's been a while, and by a while I mean almost 4 months.  To my regular readers I apologize; life can have a pesky habit of getting in the way sometimes.

But back to business...

In September, I found myself attending a conference in downtown Huntsville with an old friend from college.  Being adventurous eaters who appreciate local quality, we decided to check out the new downtown eatery, The 3 Skillets, during one of our lunch breaks.

Nestled between a popular pizza parlor and a swanky speakeasy style bar on the "north side" of courthouse square, the unassuming, glass-fronted, lunch counter style venue sits in promising location.  Unfortunately, the meal and service were utterly without promise.

We chose to sit at two of the many seats lining the long counter.  After a considerable wait, a member of the waitstaff finally acknowledged us and took our drink orders.  The quaint mason jars in which our drinks were delivered verged on cliche, but were appreciated for their considerable volume.

Like any good dinner, the 3 Skillets runs a rotating blue-plate entree  menu with an assortment of sides, ranging from German cucumber salad to roasted carrots to mashed potatoes and gravy... You know good dinner grub.

Now for anyone who has never eaten at lunch counter, patrons can see everything.  They can see how the food is prepared, how your kitchen staff is dressed, and even who washes their hands and who doesn't.  As someone who occasionally works as a guest chef, opening your kitchen to general public takes a great deal of courage and I sincerely admire the brave owners for attempting to do so in their restaurant.  However, in this particular environment preparations must be taken to ensure a successful dinning experience for your patrons.  And the failure of this establishment to do so is probably the precipitating factor for my dissatisfaction as a dinner.  

During our visit, the special of the day was euphemistically listed as "roast beef."  When the line cook removed the cover from the the large roasting pan sitting on flat top, what awaited us was nothing more than a dry-roasted slab of beef brisket.  In addition to lacking any seasoning, the beef was dry and poorly trimmed (it still contained the massive fat cap characteristic of the cut), resulting in an very gristly mouthfeel.

The sides with our orders were equally disappointing; bland cucumber salad (with the though skins still attached to the vegetable) and under-cooked carrots.  The only thing of any culinary significance, were the mashed potatoes, which were hearty, creamy, and packed with flavor (order them without gravy, trust me).

Back to the primary problem with a lunch counter-esque setting.  For the entire duration of my meal, I watched their cooks and waitstaff with both professional curiosity and admiration.  Their skill wasn't without merit, but was unfortunately lacking in cleanliness.  As I was walking out the door, I took a final look back toward the line, when I caught a glimpse of the line cook... while this wouldn't have been out of place, his hand certainly was.  It was elbow deep in a jar of pickles.  After emptying his hand full of pickles into a holding container on the line, and still dripping with pickle juice, he proceeded to prepare the next order.  While I'm sure this action didn't endanger the clientele, it made me question the hygenic nature of their preparation area.

Note:  The burgers and breakfast items do look terrific.  But the roast beef is definitely to be avoided.  Oh, and remember to order your burger sans pickles.

Eat good food.  Drink good beer.  And above all, stay classy!

Thursday, July 12, 2012

Recipes - Kolbasniky (Real Pigs-In-A-Blanket)

Author's Note: My mother's entire family is from Minnesota (pronounced "Min-eh-Soda" and always with strong sing-song accent).  With its large population of East-German, not the former country-that's spelled with a "y," and Polish immigrants, the Minnesotan baking scene is an explosion of rich yeast breads, subtly flavored pastries, and of course "filled doughs."  Although we may not have been living in the "moderland," growing up Mom always made sure that we plenty of homemade pastries and coffee cakes on the weekend. 

Now most people have encountered kolaches at the local supermarket, you probably called them "danishes."   A close, savory cousin to the kolache, the kolbasniky has unfortunately been relegated to specialty food shoppes in areas with a large Polish population.  It's basically a dinner roll stuffed with meat, cheese, or both.  Of course like most American's, mom always called her kolbasniky "pigs-in-a-blanket."

This version takes the idea of a sausage stuffed roll to entirely different level; replacing the smoked sausage with a rich filling of sausage, bacon, chevre, and fig preserves.  On a rainy Sunday morning, they are the ideal accompaniment to warm cinnamon scones.

Kolbasniky, a savory cousin to the kolach
INGREDIENTS:
For the Dough:
-1 cup stout beer
-3 Tbs. granulated sugar
-0.75 ounces bread machine/ active dry yeast
-1 cup whole milk
-1/4 cup vegetable oil
-1 Tbs. kosher salt
-1/2 cup clover honey
-8-9 cups all-purpose flour (more if necessary)
-1 egg white lightly beaten

For the Filling:
-1 large white onion, finely diced
-3 cloves garlic, finely diced
-1 lb. Italian sausage, not in casings
-1/2 lb. bacon, cooked and crumbled
-4 oz. Chevre
-4 oz. Parmesan cheese
-1/3 cup panko bread crumbs
-6 oz. fig preserves
-4 Tbs. apple cider vinegar
-1/2 tsp. red pepper flakes
-salt and pepper to taste

Egg Wash:
-2 egg yolks, lightly beaten
-1 Tbs. water

DIRECTIONS:
For the Dough:
Heat the stout beer in the microwave on high for 45 seconds.  Add the four tablespoons of sugar, and stir until it has fully dissolved into the beer.  Add the yeast and stir vigorously.  Allow the yeast mixture to stand for 15 minutes, stirring occasionally.  *if the yeast is fresh, it should rapidly produce thick foam on top of the beer

In a small pan, heat the milk over medium heat.  Add the oil, honey, salt; stirring frequently until the butter has melted.  Carefully, pour the milk mixture into small bowl; allow to rest until the temperature reaches luke-warm. *place the mixture in the fridge hasten the cooling process

In a large bowl, combine the flour with the beer and yeast mixture; lightly with your hands.  Add the eggs and continue mixing until everything is well incorporated and well mixed.  Add the milk mixture to the flour mass and knead until the dough is springy, smooth, and elastic.  If the dough is “crumbly,” add water a tablespoon at a time.  If the dough is sticky and won’t form a ball, add some flour.  Don’t worry about these additions; the final product is a result of the natural gluten proteins found in the flour.  This variable can fluctuate from brand to brand (I always King Arthur brand for my breads).

Grease a non-reactive (glass or ceramic) bowl with non-stick cooking spray, and place the dough ball inside.  Heat the oven to 400 degrees for 2 minutes; no more, no less.  Place the dough into the oven, and allow it rise until it has doubled in bulk (approximately 90 minutes).

The dough, pre-rise
The dough, post-rise
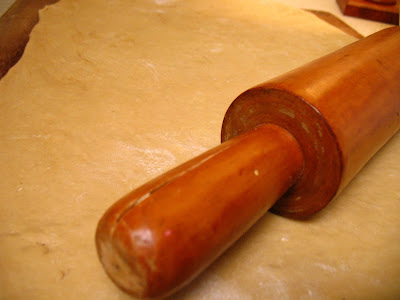
Once the dough has risen, lightly flour a bread board (not a cutting board used for things like meat, onions, or garlic) or your kitchen counter, roll out the to make a large rectangle approximately 1/4 inch thick.

Once rolled, use a 2 inch diameter biscuit/ circular cookie cutter to cut rounds out of the dough.  Allow the dough to rest for 10 minutes.

After the dough has rested, take a round of the dough and stretch it until almost doubled in diameter.  Place a large tablespoon sized portion of the filling (see following instructions) into the center of each round.  Fold one half of the round over to make semi-circle.  Crimp the exposed edges of the round together.  The "roll" should not resemble an empanada.  Carefully, tuck the corners of the semi-circle under the crimped seams.  The dough should now resemble a dinner roll, with a smooth top and the seam secured underneath. 

Place the finished roll on a baking sheet lined with parchment paper.  Repeat process until the filling, dough, or both are gone.

Brush the roles with ice water and allow to rise in the oven, approximately 60-90 minutes.

Heat the oven to 425.

Bake the rolls in the preheated oven at 425 for 10 minutes. 

At 10 minutes, immediately cut off the oven and remove the rolls from the oven.  Brush with the egg wash, and return to the oven.  Bake at 375 for 10-12 more minutes until golden brown.

Serve warm.

For the Filling:
Using 2-3 Tbs. olive oil, saute the onion for approximately 5-6 minutes over medium high heat.  Add the garlic and continue to saute for 2 more minutes.  Add the sausage, and continue to cook until thoroughly browned.  Remove from the heat and allow to cool to room temperature.  Add the bacon, bread crumbs, cheese, fig preserves, vinegar, and the red pepper flakes. Taste.  Adjust salt and pepper.

Use as a filling for the Kolbasniky or smear it on crusty bread for an interesting take on tapas.   

Eat good food.  Drink good beer.  And above all, stay classy!

Recipe - Cinnamon and Honey Scones

The perfect complement for a Sunday brunch.  Light, flaky, and "cinnamon-y;" it's just good.  When preparing these, keep in mind they are essentially biscuits.  So to achieve a light flaky texture make sure everything is as cold as possible.  I even roll/ shape mine on a frozen sheet pan.

This batch was prepared last week for an amazing Independence Day brunch hosted by good friends B&R.  Thanks again guys, I had a blast!


Cinnamon and Honey Scones
 INGREDIENTS

1 1/4 cup all-purpose flour
2 cups + 4 Tbs. cake flour
1 Tbs. baking powder
2 Tbs. cinnamon (plus extra for topping)
1/2 tsp. kosher salt
1/4 cup + 1 Tbs. butter (diced and ice-cold)
2 large eggs, lightly beaten
3/4 cup buttermilk
1/4 cup honey
1 egg yolk
1 Tbs. water
Turbinado sugar

DIRECTIONS

Preheat the oven to 425.

Combine the AP flour, cake flour, baking powder, and cinnamon in a large bowl.  Whisk the mixture several times to ensure everything is evenly distributed.

Break up the diced and "ice-cold" butter (I leave mine in the freezer for five minutes before I incorporate it) into the flour mixture.  Working quickly,  push the butter lumps between your thumb and forefinger in a "snapping" motion, while remaining submerged in the flour mixture.  Continue this procedure until the mixture resembles uniform, small gravel.

In a separate bowl combine the eggs, buttermilk, and honey.

Combine the egg-mixture with the flour and butter.  Lightly knead the dough just until everything is uniform.

Sprinkle a small amount of flour onto a frozen sheet pan, and gently push the dough by hand until it resembles at rectangle approximately 1/3 inch thick.  Either cut the traditional triangles into your dough, or (as in my case) use a circular biscuit cutter to cut the dough into individual portions.

Note-if using the biscuit cutter, you will have leftover dough after the initial cutting operation.  Simply reshape the scraps into a similarly uniform rectangle and re-cut.

Place the cut scones onto a baking sheet lined with parchment paper.  Combine the egg yolk and water.  Brush the surface of the scones with the egg mixture, and sprinkle with turbinado sugar and additional cinnamon.

Bake for approximately 14-15 minutes or until the scones are lightly brown and set (there should not be too much jiggling, but they will harden as they cool)

Eat good food.  Drink good beer.  And above all, stay classy!


Wednesday, July 11, 2012

Random Food Photo - Bacon, Chevre, Fig, and White Truffle Oil Pizza

Bacon, Chevre, Fig, and White Truffle Oil Pizza
In the past, I've written about what has to be one of the most unique, yet addictive, pizza combos on the planet--the Pancetta, Fig Compote, Chevre, and White Truffle Oil pie from Osteria Marco in Denver, CO (see the posting titled "You got your fig on my pizza! You got your pizza on my fig" for details). 

It's so addictive, I turned it into an appetizer and a panini, but until now the pizza has alluded me. My crust was always too soggy, burnt, or lacking any depth of flavor; and it simply wasn't a suitable vehicle for anything except maybe the frozen mass produced toppings adorning the pizzas from the big carry out chains.  But after purchasing my first bread/ pizza stone a few weeks ago, I have now conquered the pie. 

The above image is from the specialty pie that I made last week for patrons of the Saturday Beer Dinners at the Nook Tavern in Huntsville, AL.  Featured here is my "signature" beer bread dough, with applewood smoked bacon, aged chevre, Jack Daniels turkey fig compote, and drizzled with white truffle oil. 

Of the four pies I made, I probably ate an entire one. 

Eat good food.  Drink good beer.  And above all, stay classy!

New Food Wednesday - July 11, 2012

Photo courtesy of http://blog.ideasinfood.com

No these aren't some funky ravioli or thinly sliced exotic fruits...

Find out what these could be after the jump!


Wednesday, June 27, 2012

DIY - Bacon Bourbon (or Whiskey)

(Note the photos show a popular version of a "Tennessee"/ sour mash whiskey, which is not by definition a bourbon)

In writing last week's popular post on Bacon Chocolate Bourbon Truffles, I began to wonder why I never tried to make bacon infused bourbon/ whiskey (other than the fact that whiskey and I aren't close drinking buddies).  It's super simple, only requires two ingredients, and uses the nifty, Bill Nye-esque trick of differential freezing points.

I can tell you that the finished product (in my case Jack Daniels Tennessee Whiskey) will taste like bacon with a sultry alcoholic kick to the back of the palate.  It's definitely not something I would to drink everyday, but it's so easy to make I'll let you try it and see for yourself.


Bacon Bourbon (in this case Tennessee Whiskey) being mixed before freezing

Step 1-
Cook bacon; save grease.  In this case, the exotic smoked flavors found in some designer bacon cuts could lead to some funky flavor combinations in the final product.  I would stick to more neutral hardwoods (hickory, maybe apple) for your first experiment.  To cook the bacon, simply put it on a wire rack on top of a sheet pan and place in a un-preheated oven.  Then turn the heat to 425 degrees and let it cook until crispy (approximately 20-25 minutes depending on how quickly your oven comes to temperature)

Step 2-
Eat bacon (revel in the fact that your at the top of the food chain and someone's not eating you on a BLT)

Step 3-
Pour the fat through several layers of cheese cloth to remove any crunchy bits of bacon/ gristle.

Bacon Grease prior to straining

Step 4-
Cool the fat to room temperature or slightly colder, but still retaining it in a liquid state.  Remember alcohol evaporates from solution at approximately 170 degrees (f), so if your grease is too hot the alcohol will evaporate leaving you with watery fat.

Step 5-
Combine one part bacon grease to three parts bourbon/ whiskey in a container with a tight fitting lid.  Shake vigorously.

Bacon Bourbon, post shaking

Step 6-
Allow the grease and bourbon to mellow at room temperature for approximately 6-12 hours.

Step 7-
Without disturbing the top layer of grease, transfer the container to the freezer.  Leave it in the freezer until the top layer of grease has formed a solid mass.

chillin in the freezer (sorry for the pun) next to its lemon-infused cousin

Step 8-
Remove the layer of grease... and voila; Bacon Bourbon (or in my case whiskey)!

Eat good food.  Drink good beer.  And above all, stay classy!

New Food Wednesday - June 27, 2012


For our "neighbors to the north"

Find out what it is after the jump!


Thursday, June 21, 2012

Random Food Photo - Raspberry and Jack Daniels Brownies

Dark chocolate brownies combine with tart raspberries and smoky Jack Daniels in this complex cake
Just a random photo for the time being.  I still need to tweak the recipe a bit more.  But for aspiring home cooks out there, it might give you a glimmer of inspiration. Enjoy!

Eat good food.  Drink good beer.  And above all, stay classy!

Wednesday, June 20, 2012

New Food Wednesday - June 20, 2012


No it's not a new incarnation of that damnable retro-cheese ball monstrosity, but it does involve bacon.

Find out what it is after the jump!


Recipes - Chipotle Pimento Cheese


Chipotle Pimento Cheese (processed in a food processor for a spreadable consistency)

In college, I was fortunate to have the means and opportunity to spend several summers studying in the small state of Guanajuato in central Mexico.  And while the old Mexican grandmothers in Guanjuato make some fantastic tortillas and mole, their real culinary triumph is the bolillo.

Bolillos in Mexico (photo courtesy of wikipedia.org)

Similar to small individually portioned baguettes, these little morsels of heaven have a light, fluffy interior with a hard crusty outer shell that explodes upon first bite.  These perfect examples of regionalized French cooking are frequently served in restaurants with a spicy and lightly tinted sauce that pleasantly warms your mouth and leaves you wanting more.

Every time I would visit, I would have this sauce and ask the waitstaff how to prepare it.  They would always come back with a long list of ingredients and preparation techniques that at the time I was unfamiliar with.  Finally, I gave up and relegated it a back of mind where it would wait undisturbed for 3 years.  

Fast forward 3 years...in an attempt to elevate ordinary fat-free Greek yogurt I added a few drops of chipotle hot sauce when it dawned on me; IT WAS ADOBO AIOLI!   So I grabbed a can of chipotle chilies in adobo sauce, some mayonnaise, and my handy stick blender and 30 seconds later had a sauce fitting a bolillo.  The only problem was I didn't have a bolillo.

Now in the South, every home cook know how to make at least two things: grits and pimento cheese.  The later is nothing more than mayonnaise, cheddar cheese, pimentos, and a proprietary blends of spices.  And so my rendition of a Very Deep South pimento cheese was born from a need to use that absolutely delicious adobo aioli.

Pimento cheese on crackers, pictured with a thicker consistency (photo courtesy of wikipedia.org)

*when preparing this dish it can be processed in a food processor for a more even and spreadable consistency ideal for crackers, or it can be simply mixed and retain its "chunkiness" which is perfect for a more hearty sandwhich. 

INGREDIENTS

-2 chipotle chilies in adobo sauce
-2/3 cup mayo
-1 lb. finely shredded extra sharp cheddar cheese
-1 lb. shredded pepper jack cheese
-4 oz. cream cheese
-6 oz. pimentos in juice
-1 small can green chilies (optional)
-1/4 tsp. garlic powder
-1/2 tsp. onion powder
-1/2 tsp. black pepper (or to taste)

DIRECTIONS
Puree the chipotle chilies until they are a finely ground, uniform consistency.  Combine with the mayo (you could stop here and a have a great sauce perfect for dinner rolls).

Combine the remainder of ingredients.  Mix until the desired consistency is reached.  For a more uniform and spreadable texture, consider lightly combine in a food processor fitted with a steel blade.

Refrigerate for at least 2 hours to allow the flavors to combine.

Serve on bread, toast, celery, crackers, hamburgers, bacon, tortillas, pizza, fried green tomatoes, ice cream... Really anything you can think of!

Eat good food.  Drink good beer.  And above all, stay classy!

Monday, June 18, 2012

Recipes - Springtime Italian Cake (Limoncello & Thyme)

Limoncello and Thyme Cake with Amaretto Icing
 I admit that the combination of flavors in this cake may be a little intimidating to some... After all who puts a savory herb like thyme in a dessert?

Well, the Italians of course.  Folks from "the boot" have an affinity for herbaceous accents in a variety of foods from desserts to cocktails (to this day they produce some of the best bitters in the world).  And although it may not necessarily be of Italian origin, this cake captures the essence of Italian desserts and into a single scrumptious bite.  Tart lemon meets sweet honey meets light thyme meets amaretto in an homage to Italian grandmothers everywhere.

Simply decorated in more rustic / homemade idiom for Fathers Day 2012
 INGREDIENTS

For the cake:
11/2 cups all-purpose flour
1 cup cake flour
1 teaspoon baking powder
1/2 teaspoon baking soda
1/2 teaspoon salt
1/4 pound (1 stick) unsalted butter, softened
11/4 cups sugar
1/3 cup honey
3 large eggs
3/4 cup buttermilk
2 tablespoons limoncello
2 tablespoons freshly squeezed lemon juice
1 tablespoon grated lemon zest

For the lemon filling:

1 cup confectioners sugar
Grated rind of 1 lemon
2 tablespoons butter (+ 4 more tablespoons)
1 tablespoon corn starch
1 egg
1 tablespoon lemon juice
Dash of salt 

For the Amaretto buttercream frosting:
1/4 pound (1 stick) unsalted butter, softened
4-5 cups confectioners sugar
1-2 teaspoons almond extract (depending on taste)


The "fancy version" produced for a friend's birthday


DIRECTIONS

Preheat the oven to 350°F. Grease two, 8-inch round cake pans with non-stick cooking spray.  Line the bottoms with parchment paper. Spray a light layer of non-stick cooking spray over the parchment paper, and dust the pans with flour.

Combine the all-purpose flour, cake flour, baking powder,  and baking soda in a large bowl.

In a large bowl, or the bowl of a stand mixer, cream the butter until light and fluffy.  Add the sugar, honey, and salt and mix until well combined.

One at a time add the eggs the butter and sugar mixing thoroughly after each addition.

Working in alternating batches, add the flour and buttermilk to the mixture of butter and sugar.  (e.g. mix a third of the flour into the butter/ sugar, then add a third of the butter milk).  Continue in this alternating fashion until all of the ingredients have been incorporated, but not overmixed.

Add the limoncello, lemon juice, and lemon zest to the batter.  Stir to combine.

Pour into the floured pans and bake for 27 - 30 minutes, until a toothpick inserted into the center comes away free of batter/ sticky crumbs.

While the cake is cooling, prepare the lemon filling.

Combine the ingredients for the filling (minus the four additional tablespoons of butter) in a small bowl and whisk violently until everything is uniform and well mixed.  Heat the mixture on the stove top until boiling.  Reduce heat to low and continue to cook for 1-2 minutes.  (Make sure to constantly stir with a wire whisk while the mixture is cooking).  Remove from heat and add the additional butter to the mixture one tablespoon at a time, stirring until each addition has melted.  Allow to cool to room temperature before filling the cake.

To prepare the icing, beat the butter and 2 cups of confectioners sugar in a medium bowl with an electric mixer until smooth and creamy, about 3 minutes. Beat in the milk and almond extract. Gradually beat in 2 to 3 more cups of confectioners sugar until the buttercream is thick and creamy.

Remove a small indented area from the top of one of the cakes.  Into this indention pour the filling.  Invert the remaining cake on top of the filled section and frost with the icing.

Eat good food.  Drink good beer.  And above all, stay classy!


Thursday, June 14, 2012

Random Food Photo - Rustic Italian Bread

Rustic Italian Bread
My most recent foray into Italian gastronomy didn't stop with the Limoncello Thyme Cake from the previous post.  (After all, why should one stop with dessert?  I know I never have). No, it only stopped after a rare self-indulgence into the wonderful world of carbs, with this terrific buttermilk-based, rustic Italian Bread.

Mangiare del buon cibo. Bere buona birra. E, soprattutto, rimanere di classe.
(Eat good food.  Drink good beer.  And above all, stay classy!)

Random Food Photo - Limoncello and Thyme Cake

Limoncello and Thyme Cake for a Friend's Birthday
So... Last weekend I was feeling very Italian.  And for a friend's birthday I made a limoncello thyme cake.  Recipe to follow next week after Father's Day.

Eat good food.  Drink good beer.  And above all, stay classy!

Wednesday, June 13, 2012

What's in a table?

So for the past year, I've been eating all of my meals either on the sofa or on the patio.  I could say that I was being ironically chic, the food blogger doesn't have a kitchen table.  But the plain truth is that I'm single and didn't really see the immediate need to purchase a dining room set. 

But along with insurance payments, car payments, and the less-pleasant accoutrements of adulthood, one's transition to maturity also involves a shift to more sophisticated entertaining.  You know, the kind where the table isn't used strictly for beer pong. 

My plan for the table all started about 6 months ago, when I noticed a picture of a refinished table on a design blog.  It had been transformed using a dark oak stain with white words stenciled on its surface.  It was creative and fun, while still conveying a necessary sense of style and whimsy.  Almost as if were saying "Hey so I'm supposed to be a grownup, but I don't always know how to act like one." I knew that I wanted something similar for my small dinning nook.

The trouble with my plan; I didn't have a table to refinish.  I spent months crawling through thrift stores, searching antique outlets, and frequenting yard sales without so much as a single possibility.

I finally found the table I was looking for tucked away in the back of a neighbors garage.  $70 later, it was mine.

I know it's not food related (exactly), but I had to share the before and after photos!

Before (note the spider webs near the closest leg)

After (minwax red mahogany stain with white stenciled letter)
After
Eat good food.  Drink good beer.  And above all, stay classy!

New Food Wednesday - June 13, 2012


We're back after a two week hiatus!

For today's NFW post, think Venice and Northern Italy, and remember most of Italy is coastline...

Find out what it is after the jump!


Tuesday, May 22, 2012

Random Food Photo - Bacon Pancakes


So in one of my recent searches for "manly food," I stumbled across this incredible idea for "Bacon Pancakes."

To read the complete post, visit the good folks at: http://parchedreports.blogspot.com

Eat good food.  Drink good beer.  And above all, stay classy!

New Food Wedneday - May 23, 2012

photo from www.dailycocaine.blogspot.com

What could it be?

If you guessed an aspic, you're close...but not entirely.

Find out what it is after the jump!

Thursday, May 17, 2012

New Food Wednesday - May 16, 2012

Photo courtesy of wikipedia.com

So today's post isn't exactly a mystery.  But for most blathering colloquials living stateside (like me), it's probably unheard of.

Find out more about this unique food stuff after the jump

Wednesday, May 16, 2012

When Racism Strikes the Kitchen Table (an editorial)

Just to be clear I’m not talking about apples lynching oranges, I’m talking about actual, gut-wrenching, despicable racism; the kind of racism practiced by Hitler, the Klan, and similarly intolerant groups to separate and subjugate individuals based on nothing more than physical characteristics.

I won’t be the first or the last person to acknowledge this fact, but Alabama isn’t exactly forward-thinking.  We still derive most of our state taxes from sales tax, which places a higher burden of taxation on the poor.  While we have legally abolished mandated segregation, centuries of racial stratification are difficult to overcome and it still persists in many of our public schools, colleges, and universities.  In some counties it’s still illegal to sell alcohol on Sundays, and of course we didn’t have paved roads until 1895!

Despite these maladroit quarks, the “Yellowhammer State” does have a few things in its favor.  First, the soil (especially in South Alabama) is rich and fertile, and when combined with a long growing season gives farmers a wide variety of options for planting selections.  Second, people who grow their own food seem to have a deeper appreciation for its preparation and consumption.

It should go without saying, but someone who actually knows what went into the production of that tomato or this hamburger patty will pay much closer attention to how it’s prepared.  This is a legacy that continues in the Deep South.  Fresh ingredients and un-complicated cooking methods combined with Southern hospitality summarize the South’s culinary heritage.  And it’s something that the rest of the country is starting to notice.  Places like Los Angles and New York are starting to see an influx of “Southern” or “Soul Food” eateries as a testament to the quality of this rich culinary heritage.

Despite decades of progress, Alabama’s racist past is catching up with the times and it is now threatening our culinary heritage and its future.  Instead of targeting African Americans, Alabama’s racists are now operating under the guise of “Immigration Reform.”  In last year’s legislative session Alabama lawmakers passed an article of legislation known as House Bill 56, “which turned state and local police officers into papers-checking immigration agents and imposed a grab bag of criminal punishments and deterrents on undocumented immigrants and on businesses and charitable organizations that help or hire them” (The New York Times – May 15, 2012).

I fully acknowledge that illegal immigration is contributing to wide variety of problems around the country; including state-wide budget issues in California and Arizona.  But in Alabama seriously?

Alabama citizens protesting the passage HB56 (photo from http://es.globalvoicesonline.org/)

A state that receives most of its taxes from sales taxes would guarantee that illegal immigrants pay a considerable amount of their wages in taxes.

A state that takes pride in its agricultural heritage should welcome people as connected to the land as many of these immigrants.

A state that savors it culinary traditions should extend an olive branch to a people whose culinary roots pre-date America.

Instead Alabama’s immigration law has forced many illegal immigrants to flee its borders.  As a result many of Alabama’s farmers who once relied on immigrant labor to pick their crops, are now switching to “mechanized crops” or those that can be easily processed with little human contact (i.e. peanuts, cotton, soybeans, wheat, and corn).  So much for diversity in Alabama’s fields; I suppose it’s fitting that since we’ve done everything in our power to legally limit racial diversity that we should attempt to do the same in every other aspect of our lives.

Tomatoes rotting on the vine, as a result of Alabama's immigration law(s)


For Alabama's fans of the “farm-to-table” concept, it’s probably time to invest in shovel and rake because it won’t be long before what you grow in your backyard is all that is available.


Eat good food.  Drink good beer.  And above all, stay classy!

Wednesday, May 9, 2012

Recipe: Beer Pancakes (with Terrapin Moo-Hoo Chocolate Stout)

The perfect brunch after a night of heavy beers.  These pancakes combine the best of both worlds, beer and cake for breakfast... What's not to love?  

By combining chocolate maltiness and a light fluffy texture, a batch of these is sure to impress!


Beer Pancakes; one word "YUM!"

 INGREDIENTS:

-2 eggs
-1 cup beer at room temperature (your choice, feel free to play around with the selection; just remember that the cakes will take on the flavor profile of your selection)
-2 Tbs. vegetable oil
-2 Tbs. honey
-1 cup all purpose flour
-1 Tbs. granulated sugar
-2 tsp. baking powder
-1/2 tsp. kosher salt
-1/2 tsp. vanilla extract

DIRECTIONS:

Mix the wet ingredients (including the honey but minus the vanilla), beating lightly until fully incorporated.

In a separate bowl, combine the dry ingredients.

Gently add the dry ingredients to the wet base.  When mixed, add the vanilla.  Make sure not to over-mix the batter. 


I used the Terrapin Moo-Hoo Chocolate stout for my cakes
Grease a stove top pan or an electric griddle. Pre-heat to approximately 400 degrees or medium-high.

When the pan has thoroughly heated, pour 1/4 cup of batter onto the surface of the pan.  When bubbles start to appear around the edges, gently slide a thin spatula under the cake and quickly flip.  Cook for approximately 1 additional minute.

Forget the syrup, just top with some light confectioners sugar, and enjoy!

Eat good food.  Drink good beer.  And above all, stay classy!

Tuesday, May 8, 2012

Recipes: Triple Chocolate Raspberry Cake

Let them eat chocolate (with a little cake)!  Around the office chocolate reigns supreme, and for this month's "corporate birthday celebration" the cake is a pleasant combination of chocolate, chocolate, chocolate, raspberry, and cake.  

It's a rich, moist, dark chocolate cake, filled with a raspberry jam/ compote, iced with a chocolate ganache, and topped with shards of, you guessed it, chocolate.  

Triple Chocolate Raspberry Cake
 RECIPE: Triple Chocolate Raspberry Filled Cake

Ingredients:

For the cake:
-2 cups white sugar
-1/2 cup vegetable oil
-1 tsp. kosher salt
-1 cup whole milk (at room temperature)
-2 eggs and 1 egg yolk (at room temperature)
-1 3/4 cup all purpose flour
-3/4 cup dark chocolate cocoa
-1 1/2 tsp. baking powder
-1 1/2 tsp. baking soda
-2 tsp. vanilla extract
-1 cup boiling water with 1/8 tsp. espresso powder

For the Raspberry Filling:
-1 can raspberry pie filling
-5 oz. raspberry preserves
-5 Tbs. Tennessee whiskey (aka Jack Daniels)
-1/2 tsp. kosher salt

For the chocolate ganache:
-2 oz. dark chocolate chips
-3 oz. semi-sweet chocolate chips
-5 oz. dark rum
-10 Tbs. unsalted butter (cut into tablespoon size pieces for convenience)

For the Chocolate Shards:
-See the dedicated post here: Recipe and Directions for Easy Chocolate Shards


Directions:

Preheat the oven to 350 degrees.

Lightly grease the inside of two, 8 inch metal cake pans (I use a spray-on no stick cooking spray for convenience).  Place a custom cut sheet of parchment paper inside each of the pans, right on top of the greased surface.   

Oasis Moment: To cut the parchment paper, place a cake pan over the parchment paper, and trace the outline using a sharp utility knife.  Repeat for the second pan.


Then spray the entire pan with an additional layer of grease, so that the parchment paper is covered.

Sprinkle a liberal amount of cocoa into the inside of each pan, and shake vigorously until the entire inside of the pan is covered with a thin layer of cocoa.  This will significantly improve the odds of the cake separating easily from the pan after baking.

Mix the flour, cocoa, baking powder, and baking soda in a large bowl.


In another bowl, or the bowl of your stand mixer, combine the oil, sugar, and salt.  Mix until combined.  Add the eggs.  Mix until combined.  Add the milk.  Mix until combined.

Working in quarters, add the dry ingredients to the wet.  Combining after each addition.  Add the vanilla.

When the water is boiling, add it to the batter, making sure to scrape the sides.

Pour an even amount of batter into each pan.  Bake in the center of the over for 30-33 minutes, or until a toothpick inserted into the center of the cake comes out free of batter.


Cool the cakes on a wire baking rack for 10-15 minutes.  Remove from the pans.   

Oasis Moment: To remove from the pans, quickly run a knife on the outside edge of the pan, trying not cut the cake.  Place a large plate upside down, on top of the cake.  Invert the cake pan and the plate, so that the cake pan is upside down and the plate is right side up.  The cake should easily fall out of the pan.

Allow the cake to cool to room temperature before proceeding.

While the cakes are cooling, start the compote.  Combine the raspberry pie filling, preserves, whiskey, and salt in a small sauce pan.  Heat until everything is well mixed and the salt has fully incorporated.  Allow to cool to room temperature. 

When the cakes have cooled, cut off the domed portion of the cake top so that the top is level. 

Oasis Moment: I find that long serrated knife (a.k.a a bread knife) works the best for this task.  Simply position the knife directly under the domed portion and carefully slice off the top.  Repeat with the second cake.


On one of the cakes, make a small 1/4 inch indention, leaving approximately 1/2 of cake on the sides (see below image)

Technique for filling cake
Fill the hollowed-out cake with the filling.  Place the second cake round on top of the base.

To make the ganache, use a double boiler (a glass bowl over a pan of simmering water works fine) to melt the chocolate with the rum.  Remove from heat, then working in tablespoon sized pieces add the butter.  Make sure to stir until each tablespoon of butter has melted before adding the next.  Allow to cool until spreadable, stirring occasionally.

Cover the cake with the ganache, and decorate as you desire.

Eat good food.  Drink good beer.  And above all, stay classy!